The thermostatic cartridge is a key component of the thermostatic mixer. as it ensures the proper functioning of the tap. Typically made of ceramic, these cartridges wear down over time, depending on usage, and should always be handled with care. It’s also recommended to choose a high-quality branded mixer tap to minimise issues. In many cases, a faulty mixer is due to a malfunctioning thermostatic cartridge.
Regular maintenance is recommended. At the first sign of trouble, and before considering a full replacement, it’s best to clean the cartridge to prevent issues like sudden temperature changes that could lead to burns. The good news is, there’s no need to hire a professional – you can easily clean your thermostatic cartridge yourself. Here’s a quick guide on how to do it.
What is the purpose of the thermostatic cartridge?
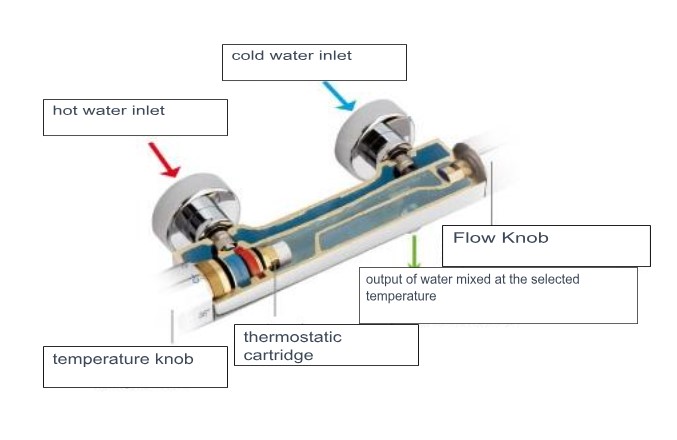
The thermostatic cartridge regulates the flow of water and at the same time ensures that the temperature is maintained at the level desired by the user. It is usually made of metal or ceramic with a cylindrical shape. The cartridge consists of a head, a casing, an axial rod and a control element. The casing plays an important role, as it is particularly responsible for water distribution. It features three openings: one for cold water, one for hot water, and a third for mixing the two to deliver the desired temperature.
This cartridge is inserted into the thermostatic mixer, specifically, in the control knob. However, care should be taken as the cartridges are not standard, and for each model and brand of thermostatic mixer, the cartridge is available in different sizes. If you want to change the thermostatic cartridge of your mixer, make sure you buy the same reference as the previous one.
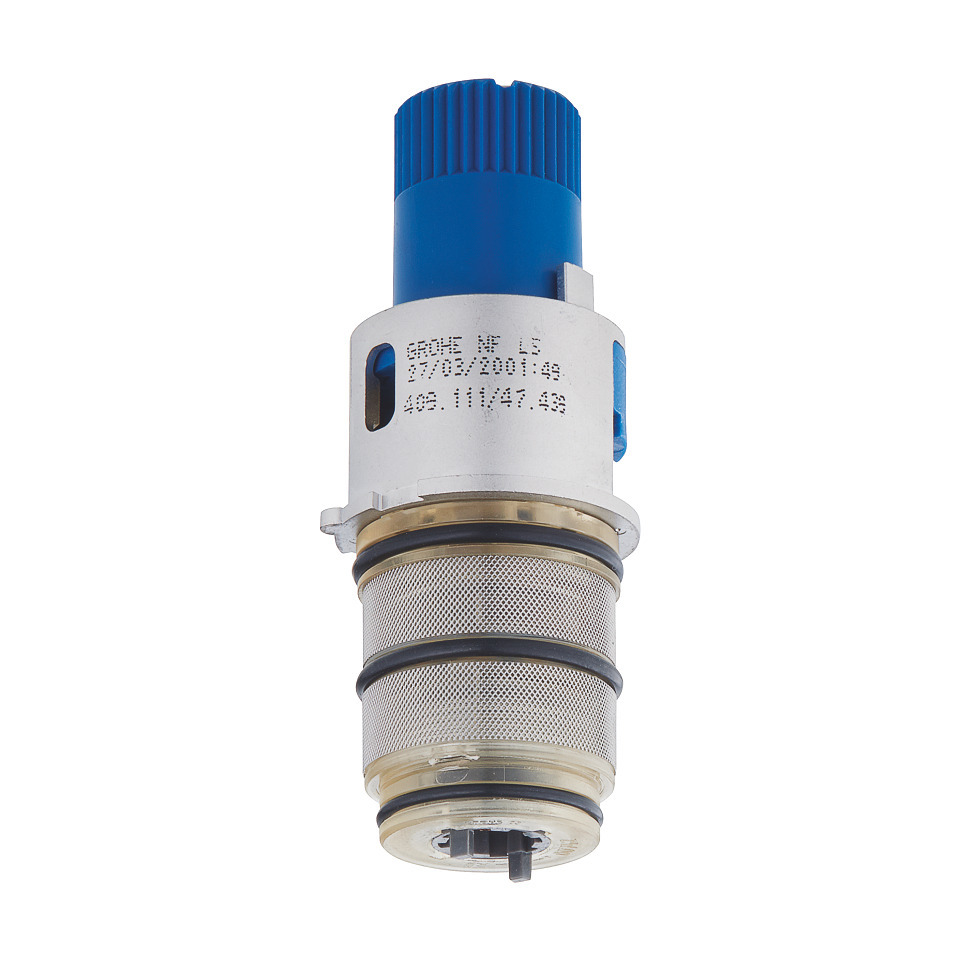
Grohe Compact Thermostatic Cartridge 1/2″ (47439000)
Just a heads-up: Some cartridge models are designed for inverted installation, with hot water on the right. Make sure you check before fitting!
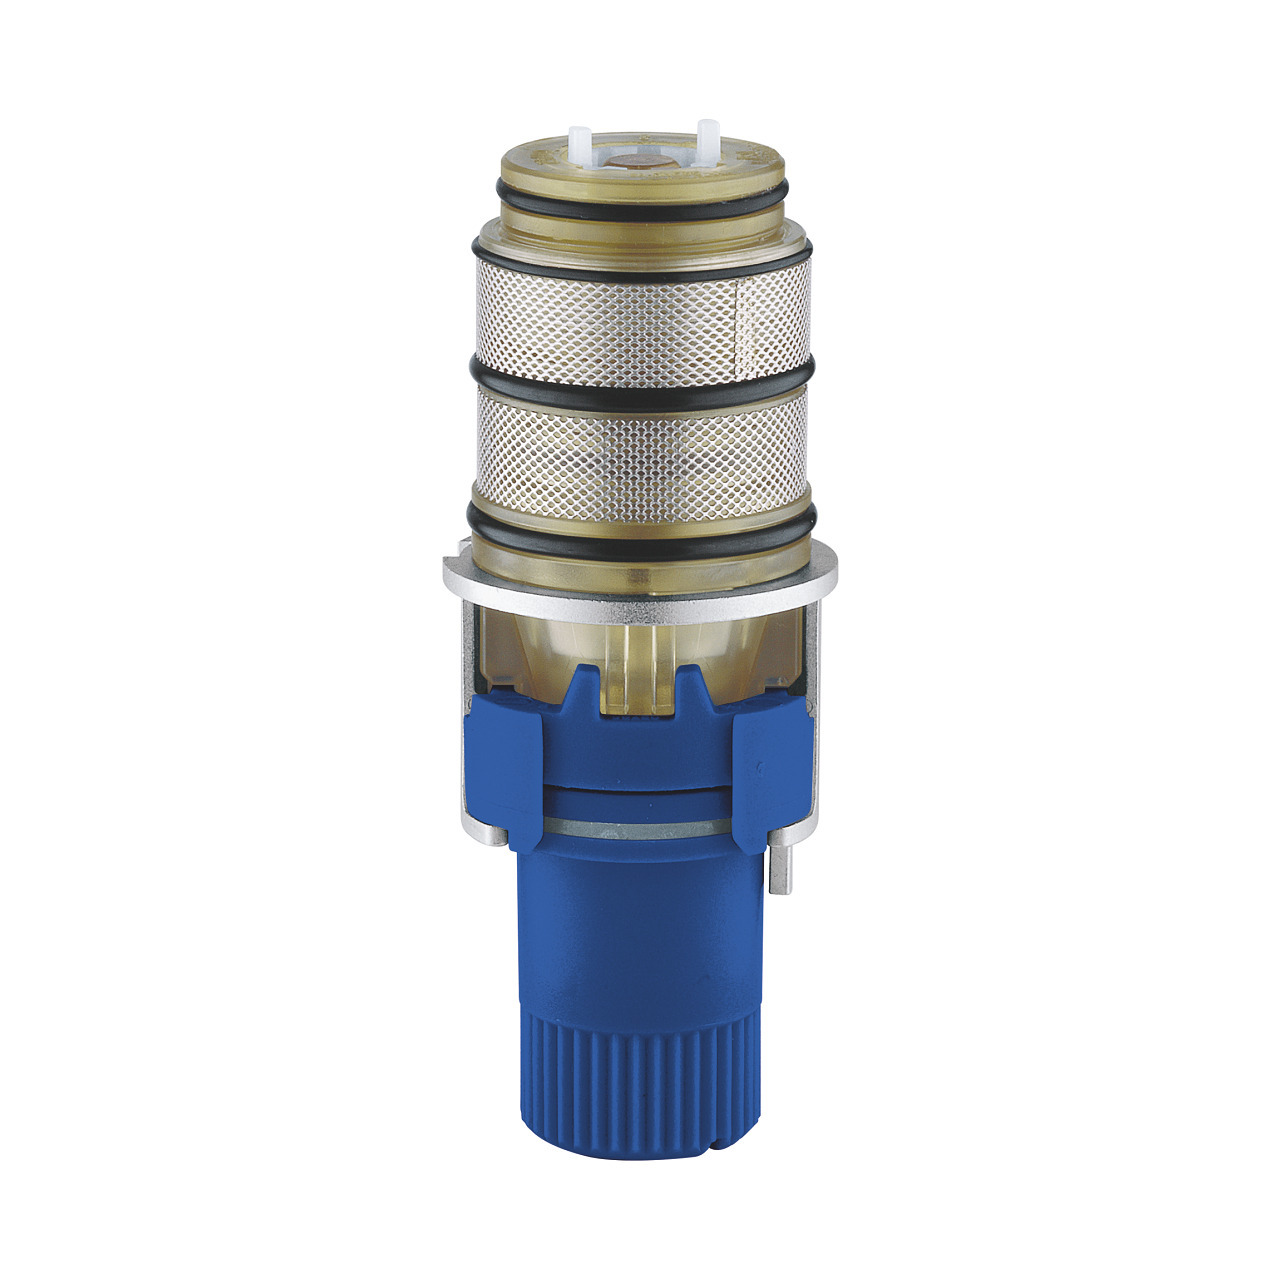
Grohe Element Thermostatic 1/2″, inverted model with hot water on the right (47175000)
The different steps to clean your thermostatic cartridge
To slow down the wear and tear of your thermostatic cartridge, you should clean it regularly. The tools you will need to do this include:
- A six mm spanner
- A 4 mm screw
- Pliers
- White vinegar
- Silicone grease.
First, turn off the water supply to ensure the mixer is fully drained before you begin. After opening the flow control lever, carefully detach the temperature knob. Then you will have access to the thermostatic cartridge. To remove it, start by unlocking the cartridge head with the 6 mm spanner. The complete detachment will be carried out with the help of the 4 screws and the pliers.
Now you need to clean the cartridge by removing the localized limescale. For this, use hot white vinegar. Soak the cartridge head in the vinegar for a few hours, then rinse thoroughly before reinstalling it. The silicone grease will be used to grease the seals. To reinstall the thermostatic cartridge, simply push it back into the mixer until the cartridge’s fixing hole aligns with the mixer’s hole. Then, screw it in and reattach the knob. Having trouble with your thermostatic cartridge? Check out our article on how to identify and fix a faulty cartridge.